Hope everyone is getting their Christmas shopping done. I still have a few things to get and then I can finally start wrapping. I have rounded up some items for home gift ideas that I think everyone will love or could use at any time of year.
Besides summer, fall is my second favourite season out of the year. So many cute options and outfits to wear that we wait all year for. This dress is seriously my go to dress this season. I have been looking for a plaid dress and I scored this one for under $40.
There are so many ways you can wear this dress. You can pair it with a faux fur vest, faux leather jacket, a cardigan or even with leggings.
I wanted to share a quick beauty post on how to get an "All- Over Glow" within minutes. Glowing skin isn't just for the summer months, it's really nice to have glowing skin all year round as long as it looks natural. This quick and easy beauty routine will literally take you just 5 minutes to do. 5 products= 5 minutes
Step 1: Start with applying this tinted moisturizer all over your face. This tinted moisturizer is actually unisex, so even your man can use this as well. This product evens out your skin while leaving a natural glow finish.
Step 3: Apply this bronzer to the hollows of your cheeks, along your hair line and a little dusting on your nose.
Step 4: Apply this highlighter to the tops of your cheekbones, down the bridge of your nose and above your cupids bow (above the lips).
Step 5: Apply this cream illuminating eyeshadow all over each lid and even bringing it up to your brow bone. This gives the perfect amount of natural sheen to your lids and with your favourite mascara, your eyes will just pop.
Happy Spring!!
I can't believe spring is finally here. Winters are brutal here in Ontario but luckily this year wasn't so bad.
I wanted to start spring off right in white denim and this railroad stripe boyfriend shirt that I am absolutely obsessed with. This shirt is so comfortable, light weight and the fact that it is chambray with a white pin stripe makes it spring and summer appropriate. I have been wearing this shirt tucked in a lot lately but I also like to the look of it loose without it being tucked in to give it a more casual chic look.
I once did a self tanner review a while back and I thought I would do an updated post on what I currently use and recommend. It is that time of year that when we want to start self tanning and getting our skin ready for spring and summer.
I have tried so many self tanners from sprays, to creams, to mousses and so on. I definitely had ones that I absolutely loved and ones that I absolutely hated and wished I had never used.
This self tanner is definitely one of my favorites due to the fact that it is really easy to use, it is odourless, fast drying, long lasting up to 2-3 weeks and it gives you amazing colour.
I recommend using this mitt to apply the self tanner Buy Here
How to Apply:
Ok, it is so easy I promise!!
1. Make sure you have "clean exfoliated" skin. Exfoliated skin is always key in an even tan.
2. Add two to three pumps of the self tanner to the mitt and apply in circular motions over the areas you want to tan. Using a mitt ensures an even streak-free application and you also save a lot of product when using a mitt as well.
3. Apply to the tops of the hands and feet but make sure you apply it last with whatever is left on the mitt. You don't want to add too much self tanner in these places as you tend to have dryer skin.
4. Make sure you let your skin dry fully before putting on "loose" clothing.
5. Do not shower, bath, go swimming or sweat for at least 6-8 hours after applying.
How to Maintain:
1. Apply two to three times over for the next few days after the first application to achieve the colour you want. You may want to do an application every 24 hours until you are content with the shade you are at.
2. Do not exfoliate until you are ready to do an overal "fresh" application.
3. Keep your skin moisturized and hydrated
4. Do not use harsh soaps and avoid chlorinated pools for longevity
It is formulated without any:
- Parabens
- Sulfates
- Phthalates
This is another self tanner that I use if I need an instant tan which develops within an hour or two until you reach your desired colour. It is also easy to use, odourless, fast drying, comes with the mitt and a streak-free application.
I apply and maintain it the same way as I would with the Vita Liberata {2-3 week lotion} MINUS applying it a few days over to build up a tan. If you do this with the Vita Liberata Rapid Tan you will look ridiculously tan to the point where you won't look natural at all {unless that is what you are trying to achieve}.
It is formulated without any:
- Parabens
- Sulfates
- Phthalates
The weather here in Ontario, Canada has been absolutely amazing with these mild temperatures that we are having. It really hasn't been a winter at all but hey, I am not complaining. With that said, I am taking full advantage of layering and keeping those heavy coats and boots at home.
I have been obsessed with this sweater since I bought it and have been wearing it a tone. It is loose enough that I can layer with it and not to mention, the colour is quite pretty as well which will be a great transition piece for the spring.
I get so many questions on how I get my eyebrow shape and what I do to keep them manicured and full looking all the time. I thought instead of emailing you guys back, I would just do a blog post on it and share it with everyone.
Everyone has different eyebrow shapes, so a lot of the times you pretty much have to work with what you got but you can definitely make them thicker and change the shape of them by grooming and filling them in.
I am going to share below what I do to maintain my brow shape and length as well as what products I currently use to enhance them when incorporating the steps with my makeup routine.
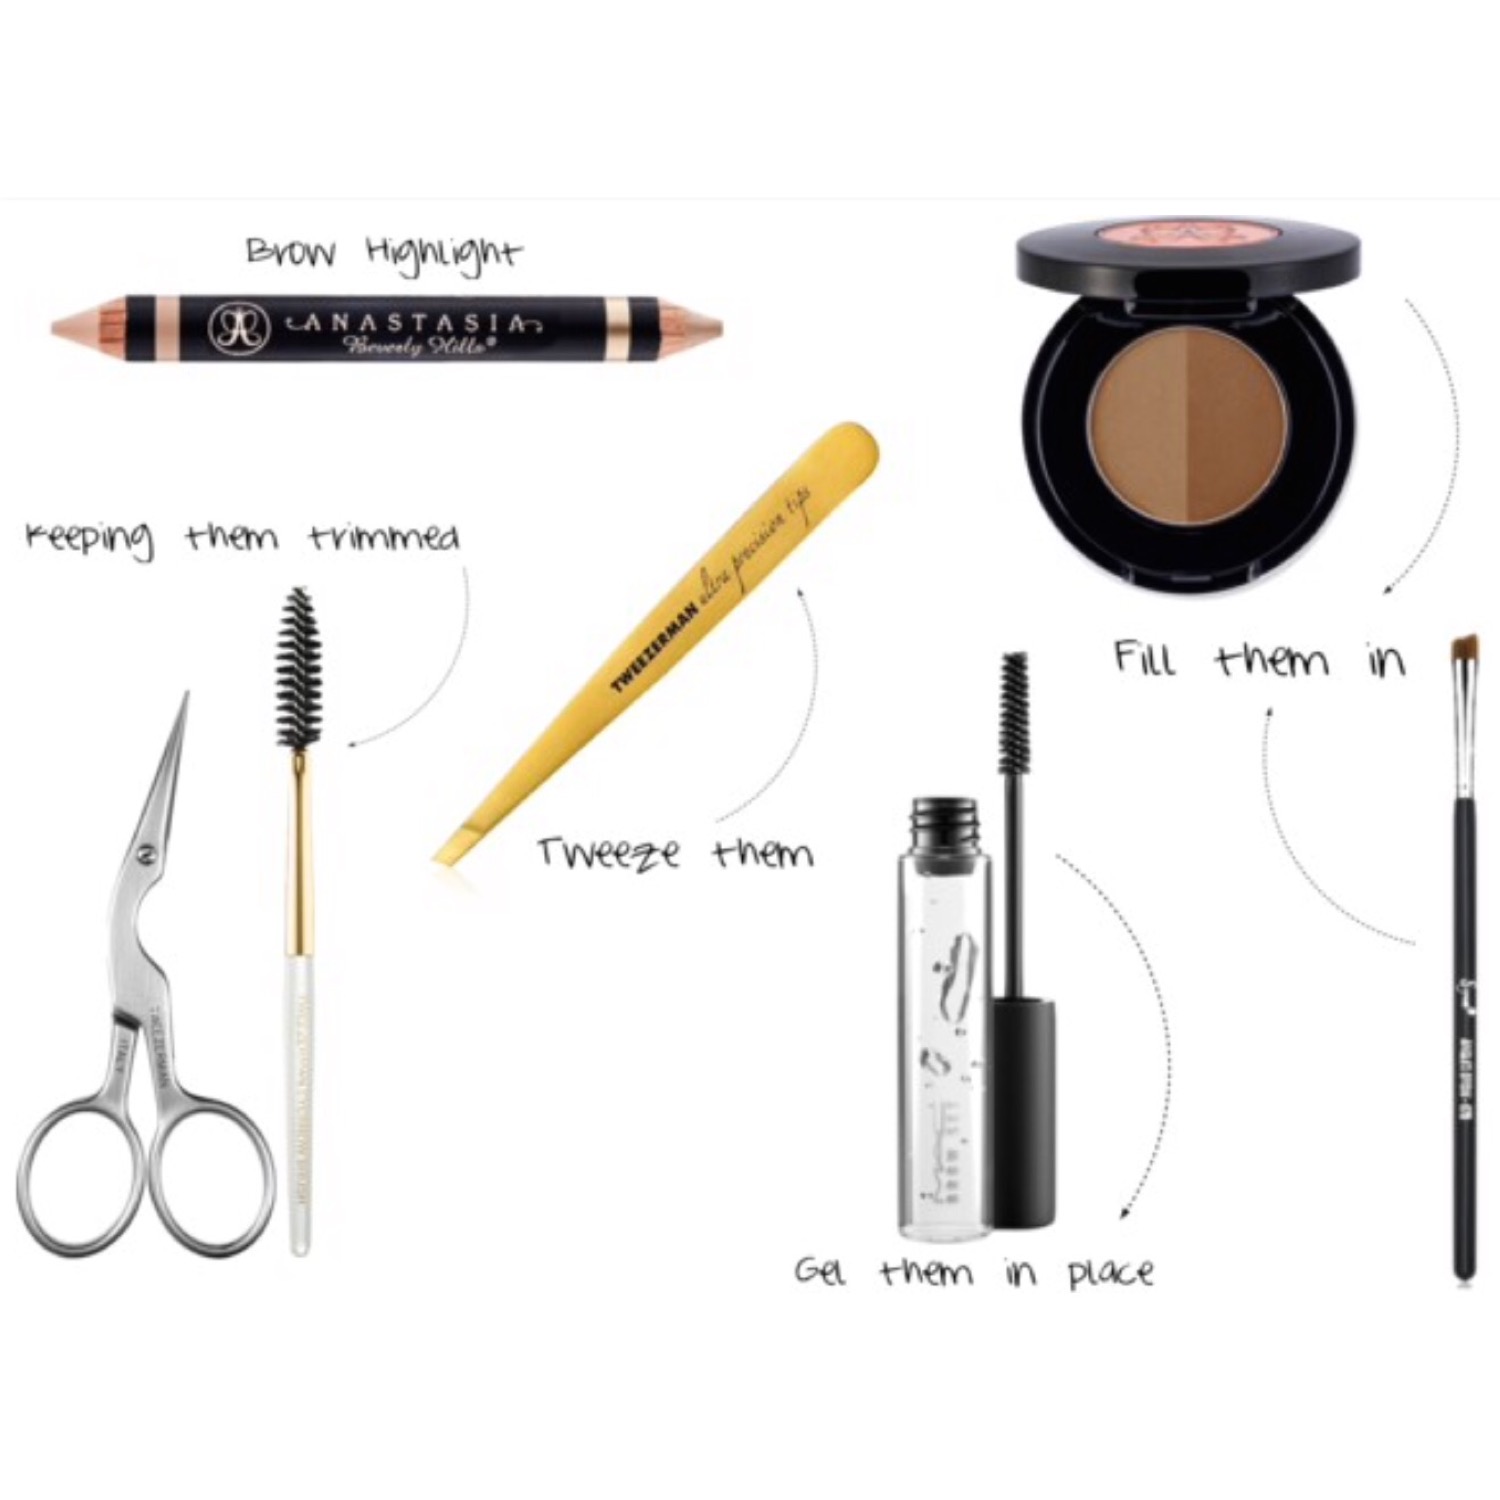
Every 5-7 weeks I get my eyebrows waxed to give them a clean fresh start. During the following weeks after my wax appointment, I maintain my brows by tweezing the odd hair that grows in. I also trim my brows during this period of time as well so that they are not too long and annoying to deal with. Trimming the brows keeps them manicured and you don't have to worry about any hairs sticking up anywhere.
How I Trim My Brows: {I tend to do these steps every 2 weeks} Step 1: Take the "brow brush" and brush your brows upwards from the thickest {inner} part to the end {tail} of the brow. When you brush it upwards, you will see how long your brow hairs actually are.
Step 2: Now take the "brow scissors" and hold them parallel to each section working from the tail section first {cutting towards the hairs}. I find it a lot easier starting from the tail and cutting towards the inner part of the brow, because you are cutting towards the hairs. If you do it the other way, I find the scissors push the hairs back down and then you are not cutting anything.
Step 3: Once you have trimmed each brow, go back with your brow brush and brush through them again and brush them upwards to see if you trimmed enough hair. If you did, you shouldn't see any hairs sticking up.
How I Fill My Brows In:
When it comes to filling my brows in, there are some quick steps that I do before the finished result. I am currently using the Anastasia Beverly Hills Duo Brow Powder in the colour Soft Brown. The brow brush that I use to apply it with is the Sigma Beauty E75 Angled Brow Brush which is an amazing brush to create the perfect filled in brow.
I like to start from the thickest {inner} part of the brow first by lightly feathering the brush in small strokes upwards. When it comes to the arch, you want to repeat the same technique as the inner part of the brow, but when you get to the tail of the brow, you then want to angle the brush and lightly feather it in the same direction as the hair is growing.
Complete the entire look and make sure your brows stay in place by using the MAC Brow Gel.
Adding Highlight:
To me, brows always stand out when you have nicely trimmed, filled in brows but they stand out even more when you add highlight to the arches.
I am currently using the Anastasia Beverly Hills Highlighting Duo Pencil in the colour Shell/Lace. This would have to be my favourite step and I never walk out of the house without adding some highlight in the arch of my brows. Not only is it defining your brows even more but it is highlighting your eye area as well which makes you look more awake.
Valentine's Day is always one of my favorite times of the year. From the Valentine candy and all the cute girly stuff that comes out that you can't wait to wear, I thought I would share some Valentine inspirations to get you ready for Valentine's Day xo!
Shop the items above and more below, by clicking on each image which will then bring you to the direct site!
When it comes to foundations, we all know it's really hard to find one that matches your skin tone perfectly and that is a keeper in the makeup bag for months and years on end. We all strive to find a foundation that gives you the finish you are looking for, doesn't break you out, scent free, not too drying nor too oily, long lasting, the perfect amount of coverage and having an SPF would be a bonus am I right?
That is why I wanted to do a beauty post for all of you and give you a little review on each of these foundations and why I still love them so much that I won't change my foundation routine.
TARTE Amazonian Clay 12-Hour Full Coverage Foundation SPF 15
I have been using Tarte Amazonian Clay 12-Hour Foundation for over two and a half years now and there is a big reason why. Hence the name "Amazonian Clay" this foundation was designed for all skin types, not just for oily skin. Whether you have dry, oily or combination skin, this foundation adjusts to your skin type which makes it long wearing up to 12 hours. It helps to reduce the appearance of pores, discolouration and gives an overall all smooth full coverage. It is buildable, so if you are not always wanting a full coverage look, you definitely have the option and it is super blendable which gives a natural look.
I tend to wear this foundation a little more during the summer months, depending on what I am doing. I find that because it does have clay in the formulation, it tends to soak up any excess oil that accumulates throughout the day without breaking me out. If I am going to the gym, I will also wear this foundation as well. During the winter months, I do wear this foundation quite a bit because I love the overall finish it gives my skin, especially when my face is a little more red due to the cooler Canadian temperatures, it gives me that extra coverage.
It is formulated WITHOUT:
- Parabens
- Sulfates
- Phthalates
- Oil
BAREMINERALS bareSkin Pure Brightening Serum Foundation SPF 20 "Readers Choice Award Winner for Allure Magazine" My Shade is "Bare Linen"
I have been using bareMinerals bareSkin Pure Brightening Serum Foundation SPF 20 for over a year and a half and has been my go to foundation in my current beauty routine. This foundation has a lighter {thinner} consistency than the Tarte foundation which makes it buildable if needed. It gives a beautiful "glowy" natural finish to the skin which makes it look like you are not even wearing any foundation {it is seriously a-m-a-z-i-n-g and I am not over exaggerating here}, it's legit. It gives the skin a brighter overall finish without having to add any extra highlight with a cream or powder highlighting product.
There really isn't a specific season that I like to wear this foundation the most, as it works amazing all year round. It is formulated for all skin types but if your skin is a little dryer, I would definitely recommend this foundation. It adds moisture to the skin and gives a dewy overall look which is great for dry skin. I love to wear this foundation in the winter due to the fact that my skin is on the dryer side and gives me the right amount of moisture along with my daily moisturizer. When it comes to spring and summer, I always tend to grab for the bareMinerals as it is a lighter consistency and especially when I want a lighter natural coverage.
It is formulated WITHOUT:
- Parabens
- Oil
- Silicone
- Fragrance